
Choosing a compartment size for a jewelry box is not a matter of copying a standard grid. Rings, earrings, necklaces, bracelets, bangles, brooches, and watches differ in shape, thickness, rigidity, and handling requirements. A layout that looks balanced in a drawing may still be difficult to use or may allow the jewelry to move once the box is handled.
For B2B buyers, effective jewelry box compartment sizing begins with the actual jewelry assortment. The objective is to provide enough space for placement and removal, sufficient clearance around raised or delicate features, and appropriate support for the way each item will be presented and transported.
This guide explains what to measure, how to translate those measurements into an interior layout, and what to verify in a physical sample before approving production.
For a broader review of box structures, exterior materials, linings, hardware, and customization decisions, refer to our complete jewelry box buying guide.
Why Universal Compartment Sizes Rarely Work
A compartment should respond to the product placed inside it. Even pieces from the same jewelry category can require different solutions.
For example:
- A low-profile band and a ring with a raised stone need different vertical clearance.
- Stud earrings, hoops, and long drop earrings cannot be evaluated with one width measurement.
- A fine chain needs chain control, while a large pendant needs space around its edges and setting.
- A flexible bracelet can lie flat or be coiled, while a rigid bangle needs a wider support area.
- A shallow removable tray may work for small pieces but may restrict taller jewelry in the level below.
Generic dimensions can produce two opposite problems. An oversized compartment allows products to move and can waste internal space. An undersized compartment can make placement difficult, compress raised features, or prevent the lid, tray, or drawer from closing correctly.
The appropriate dimensions therefore depend on the jewelry, the intended presentation, the interior construction, and the way the box will be used.
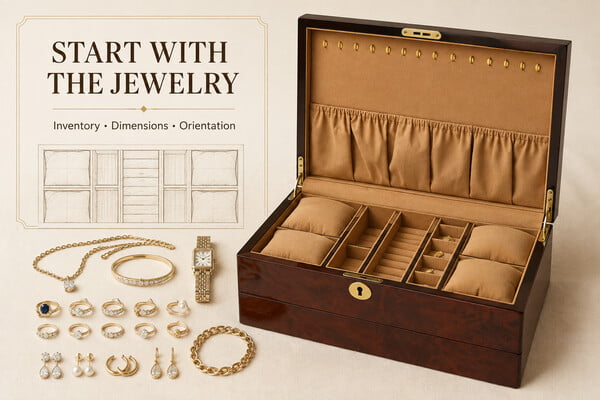
Prepare a Jewelry Inventory Before Planning the Layout
Begin with a product list rather than a sketch of the box. For every item or product group, record:
- Jewelry category
- Quantity to be stored in each box
- Maximum length, width, and height
- Shape and orientation inside the box
- Raised stones, clasps, pins, hooks, or other protruding parts
- Flexible or rigid construction
- Areas that should not rub against a wall or another item
- Frequency of placement and removal
- Whether the box will be used for home storage, retail display, gifting, travel, or repeated presentation
If a single box will serve several SKUs, measure the largest relevant item in each group rather than assuming that one sample represents the whole range. Also identify whether the buyer expects the layout to accommodate future products. A more flexible compartment may be appropriate for a changing collection, while a product-specific holder may suit a fixed presentation set.
Actual products are the best reference. When they are unavailable, accurate dimensions, scaled drawings, photographs from several angles, or representative samples can help the manufacturer evaluate the initial layout.
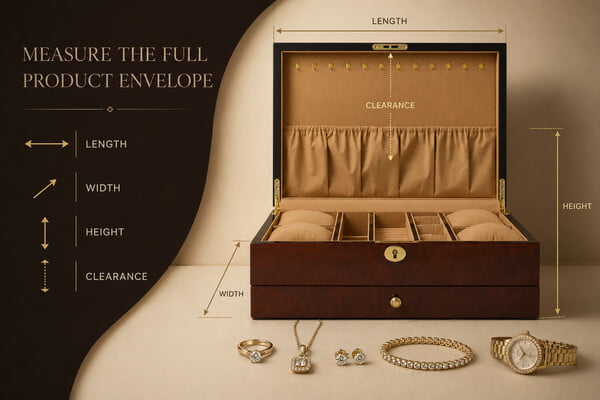
Measure the Full Product Envelope
Length and width alone are insufficient. The layout must account for the full space occupied by the jewelry in its intended storage position.
Measure the Maximum Length and Width
Measure the widest and longest points, including stones, clasps, decorative settings, and other protrusions. For an irregular piece, a top-view outline or scaled photograph may communicate the shape more clearly than two measurements alone.
Measure the Maximum Height
Height is especially important for rings with raised settings, thick pendants, cufflinks, watches, and rigid bracelets. Confirm the distance between the stored item and the lid, removable tray, or drawer above it.
Closing a box should not press the jewelry into the lining or leave contact marks on the underside of the lid.
Measure the Product in Its Stored Position
A flexible necklace or bracelet may occupy different dimensions depending on whether it hangs, lies flat, follows a channel, or is coiled. Record the measurements in the position proposed for the final box.
Include Components Stored With the Jewelry
If the box will also contain a certificate, pouch, care card, cleaning cloth, spare component, or branded insert, include those items in the complete layout. They can affect drawer depth, tray height, and the space available for the jewelry.
Match the Compartment Structure to the Jewelry Type
The correct dimensions depend partly on the support system used inside the compartment.
Rings
Padded ring rolls hold rings upright and make a collection easy to view. When evaluating the ring section, consider:
- Band width and thickness
- Height of the setting
- Distance between adjacent settings
- Compression of the padded rolls
- Ease of inserting and removing the rings
The ring should remain stable without requiring excessive pressure. Test both the smallest and largest rings expected in the assortment.
Stud Earrings
Stud earrings may be placed in small divided sections or attached to an earring panel. The layout should allow the buyer or end user to grasp the piece and handle its backing without disturbing adjacent pairs.
Small compartments should not be made so tight that finger access becomes difficult.
Hoops and Drop Earrings
Hoops need space for their full outside diameter and closure. Long drop or chandelier earrings require sufficient length and width so that decorative parts do not overlap or bend.
If earrings are displayed vertically, confirm the hanging clearance. If they lie flat, check that both earrings in a pair can be removed without pulling against the lining or divider.
Necklaces and Pendants
Necklace storage must control the chain as well as the pendant. A suitable structure may combine:
- Hooks or anchor points
- A channel or flat-lay section
- A lower pocket for the pendant and loose chain
- Separate positions for multiple necklaces
Measure the usable hanging or flat-lay length, the pendant dimensions, the chain thickness, and the clasp. Ensure that the pendant does not strike the compartment wall and that multiple chains cannot easily cross.
Bracelets and Bangles
Flexible bracelets may use open compartments, padded rolls, cushions, or channels. Rigid bangles and cuffs need enough width and height for their curvature and opening.
For a cushion or roll, check the jewelry in its closed position. The support should not overstretch a bracelet or require the user to force the closure.
Brooches, Pendants, and Cufflinks
Open padded compartments can accommodate irregular pieces, but pins, posts, stones, and metal edges still need clearance. Large open spaces may require dividers or individual supports if the products will be transported inside the box.
Watches in Mixed Jewelry Boxes
If watches are included, evaluate case diameter, case thickness, strap width, clasp construction, and the circumference when closed around a cushion. A watch section should be planned as a distinct support area rather than treated as a generic open compartment.
Buyers comparing available configurations can review the Ezicase jewelry case collection before deciding whether an existing structure can be adapted or a new interior is required.
Add Clearance Without Creating Uncontrolled Movement
The product dimensions establish the minimum space requirement, but the compartment usually needs additional clearance for the lining, manufacturing variation, placement, and removal.
There is no universal allowance that works for every product. The appropriate clearance depends on:
- Product shape and fragility
- Height and position of stones or settings
- Flexibility of the jewelry
- Compressibility and thickness of the lining
- Divider and wall construction
- Intended support method
- Acceptable movement during normal handling
- Production method and achievable consistency
Instead of applying one fixed number, ask the manufacturer to propose dimensions around the actual sample or confirmed product envelope. Then evaluate the result physically.
A close fit may be useful for a product-specific presentation, but it should not make the jewelry difficult to retrieve. A more flexible compartment may need additional support to prevent movement. The objective is controlled placement, not the tightest possible cavity.
Account for Dividers, Lining, and Padding
The outside dimensions of a tray do not equal its usable storage area. Divider thickness, edge wrapping, lining, padding, finger notches, and structural supports all reduce the available space.
When reviewing a drawing or sample, distinguish between:
- Overall internal box dimensions
- External tray or drawer dimensions
- Usable compartment dimensions after lining
- Clear opening dimensions for placement and removal
- Vertical clearance after the lid or upper tray is closed
Interior material also affects fit. Velvet, felt, suede-effect fabrics, microfiber materials, and PU leather have different thicknesses, textures, and wrapping requirements. Actual material samples should be assessed for surface feel, shedding, wrinkles, adhesive finish, color consistency, and possible transfer marks.
Do not assume that every fabric sold as velvet or suede-effect material provides the same protective or anti-tarnish properties. If a specialized performance is required, confirm the exact material specification and supporting documentation before approval.
Plan Finger Access and Daily Use
A compartment may hold an item securely but still fail during daily use. Buyers should test how the jewelry is placed and removed.
Check whether:
- Fingers can reach small earrings or rings
- A pendant can be lifted without pulling the chain
- A tray has suitable clearance for removal
- Drawer pulls remain accessible
- Jewelry catches on a divider or lining edge
- Frequently used pieces can be reached without removing several layers
- Upper trays block access to lower compartments
Finger notches, ribbon lifts, removable cushions, shallow trays, or a different orientation may improve accessibility. These features should be evaluated together with the complete box structure.
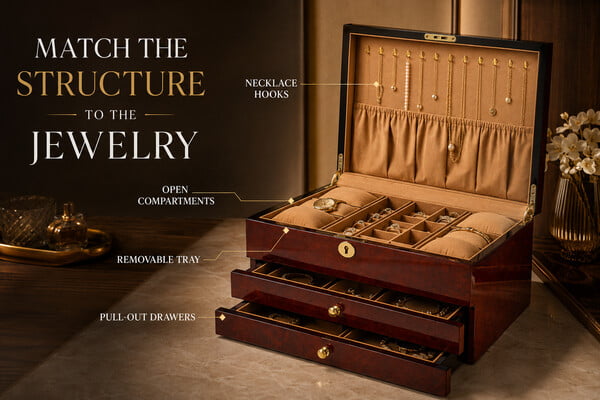
Coordinate Compartments With Trays and Drawers
Multi-level boxes can increase capacity, but every level affects the available height and user experience.
Removable Trays
Confirm the tray's usable depth, fit inside the box, lifting method, and stability. A tray that fits too tightly can be difficult to remove; one that fits too loosely may shift during handling.
Place jewelry in both the removable tray and the section below it, then check vertical clearance before closing the lid.
Pull-Out Drawers
For drawers, review internal depth, movement, alignment, handle access, and any stop mechanism. Jewelry should not catch against the level above when the drawer is opened or closed.
The insert must fit the finished drawer, including the lining and any internal structural elements. Test the drawer repeatedly with the intended products inside.
For example, this high-gloss camphor grain jewelry organizer with two pull-out drawers combines necklace hooks and pockets, open compartments, a removable tray, and additional drawer storage. It illustrates why buyers should evaluate the top-level layout, inter-level clearance, drawer depth, and access sequence as one complete system.
Mixed Layouts
A mixed jewelry collection may require ring rolls at the top, necklace storage in the lid, open compartments for larger pieces, and drawers for additional capacity. The arrangement should follow product type and access frequency rather than visual symmetry alone.
Evaluate Movement During Handling and Shipping
Interior compartments organize jewelry, but they should also be considered together with the complete protective packaging.
During sample review:
- Place the intended jewelry in every compartment.
- Close all trays, drawers, and the lid.
- Handle and tilt the box in a controlled manner appropriate to its intended use.
- Reopen it and check whether items have shifted, crossed into adjacent sections, tangled, or contacted hard surfaces.
- Inspect raised settings, clasps, pins, and delicate chains.
- Check whether loose trays or cushions have moved.
The box itself is not a substitute for suitable export or e-commerce packaging. If the finished product will be shipped with jewelry inside, the packed configuration requires its own risk assessment and validation.
Validate the Layout With a Physical Sample
Drawings and renderings help communicate dimensions and appearance, but a physical sample is necessary to evaluate fit, handling, material behavior, and interaction between components.
Use the intended jewelry—or representative products covering the relevant size range—to test:
- Compartment length, width, and depth
- Ring-roll compression and spacing
- Earring placement and backing access
- Necklace length and chain control
- Bracelet or bangle support
- Clearance below the lid and between levels
- Tray removal and replacement
- Drawer movement and alignment
- Contact with dividers, hardware, or hard surfaces
- Lining, color, logo, and overall presentation
- Protective packaging
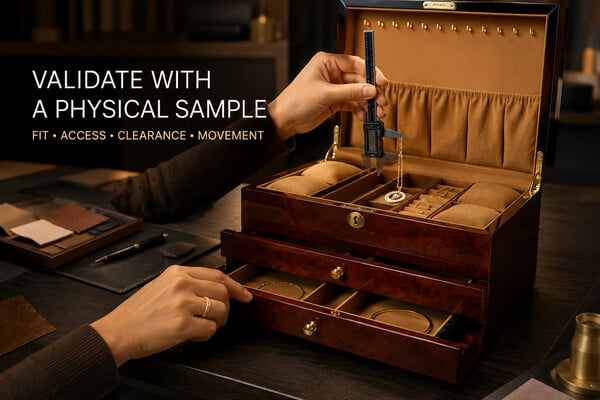
Record the approved layout in drawings, specifications, photographs, or an inspection checklist. If a compartment changes after sampling, update the approval information before production rather than relying on verbal comments alone. After confirming the compartment layout, use our custom jewelry box sample approval guide to review the complete product before mass production.
Consider Manufacturing Feasibility Early
Compartment dimensions cannot be finalized independently of materials and construction. Divider thickness, tray structure, lining application, curved components, removable inserts, and assembly methods influence what can be reproduced consistently. Before finalizing the interior layout, buyers should also compare how wooden and leather jewelry box structures affect the exterior presentation, supporting body, surface treatment, and overall product format.
Before approving a complex layout, confirm:
- Proposed structural and lining materials
- Finished usable dimensions rather than only unlined dimensions
- How dividers, rolls, hooks, pockets, and cushions will be formed and attached
- Whether special tooling or additional development is required
- How the insert fits the box, tray, or drawer
- Which dimensions and visual details will be checked during production
- Whether material or process changes affect the sample, MOQ, cost, or schedule
Ezicase supports custom jewelry storage development using selected existing structures or project-based configurations. Applicable MOQ, sampling requirements, cost, and production schedule depend on the confirmed design, materials, quantity, and customization scope.
Common Compartment-Sizing Mistakes
Avoid these recurring problems:
- Using the same compartment dimensions for every jewelry category
- Measuring only length and width while ignoring height
- Forgetting raised stones, clasps, pins, or earring backs
- Applying a fixed clearance allowance without considering the product and lining
- Planning the tray before accounting for divider and lining thickness
- Creating a snug fit without enough finger access
- Adding drawers without testing clearance against the level above
- Leaving necklaces in open spaces without chain control
- Approving a rendering without testing a physical sample
- Testing only one product when the box must accommodate several SKUs
- Treating the storage box as the complete shipping-protection system
- Changing materials or dimensions without updating the approved specification
Compartment-Sizing Checklist for B2B Buyers
Before approving the interior, confirm:
- [ ] All jewelry categories and quantities are documented.
- [ ] Maximum length, width, and height are recorded.
- [ ] Raised and delicate features have suitable clearance.
- [ ] The proposed storage orientation is confirmed.
- [ ] Divider, lining, and padding thicknesses are included.
- [ ] Finger access and repeated removal have been tested.
- [ ] Necklace chains and loose components are controlled.
- [ ] Trays and drawers operate correctly with products inside.
- [ ] Lid and inter-level clearances have been checked.
- [ ] Movement during appropriate handling has been reviewed.
- [ ] Actual or representative jewelry has been tested in a physical sample.
- [ ] Approved dimensions and materials are recorded before production.
Frequently Asked Questions
Is there a standard jewelry box compartment size?
There is no universal size suitable for every product. The compartment should be planned around the jewelry's maximum dimensions, stored orientation, support method, lining, accessibility, and required clearance.
How much extra clearance should a jewelry compartment have?
The allowance depends on the product shape, fragility, lining thickness, support method, and manufacturing construction. Avoid applying one fixed value to every project. Use the actual product or a representative sample to evaluate the proposed fit.
How should compartments for rings be sized?
Consider band width, ring diameter, setting height, spacing between adjacent settings, ring-roll compression, and ease of insertion and removal. Test the smallest and largest rings expected in the assortment.
How can a jewelry box prevent necklaces from tangling?
Use an arrangement that controls both the chain and pendant, such as hooks, channels, separate positions, or lower pockets. The correct solution depends on chain length, thickness, pendant size, and whether the necklace hangs or lies flat.
Are removable compartments or trays practical?
They can provide flexible access and additional storage levels, but their fit, lifting clearance, stability, and the space available below them must be tested in the complete box.
Can an existing jewelry box interior be customized?
Selected structures may support changes to compartments, lining, colors, trays, or other interior components. The feasible scope depends on the existing construction and the requested changes, so it should be evaluated before quotation and sampling.
Conclusion
Effective jewelry box compartment sizing begins with the products, not a standard grid. By measuring the complete product envelope, matching support features to each jewelry type, allowing appropriate access and clearance, and validating the result with a physical sample, B2B buyers can develop interiors that are practical, presentable, and suitable for repeat production.
Before requesting a custom quotation, prepare the jewelry assortment, measurements, preferred layout, material direction, quantity, and target schedule. This gives the manufacturer a clearer basis for evaluating an existing structure or developing a project-specific interior.
Explore Ezicase jewelry cases or contact our team to discuss your jewelry types, interior configuration, and customization requirements.
