
Most problems in a custom jewelry box project are less expensive to correct at the sample stage than after bulk production begins. A useful sample review should therefore go beyond asking whether the box “looks good.” Buyers should compare the physical sample with the agreed requirements, test it with the intended jewelry, record every requested change, and approve a clearly identified version before production.
For Ezicase custom jewelry box projects, sample development typically takes about 10–30 days. The actual timing depends on the structure, materials, finish, hardware, branding method, packaging scope and the number of revisions required.
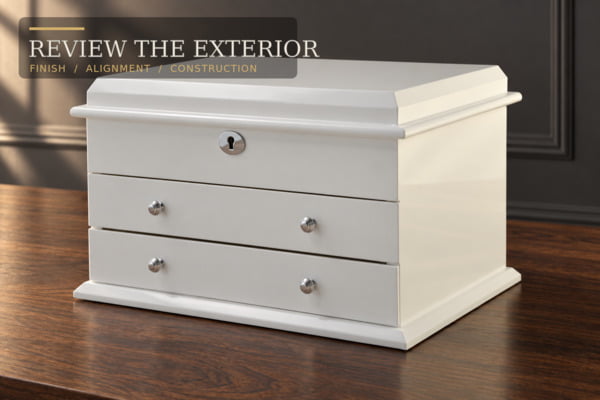 The product shown in this article is our high-gloss white jewelry collection box with drawers and mirror. Its multi-level structure provides a practical reference for reviewing exterior finish, interior layout, drawer movement, hinges and hardware during sample approval.
What Should Be Agreed Before a Jewelry Box Sample Is Made?
A sample can only be reviewed properly when both parties know what it is intended to confirm. Before sampling starts, define the product type, approximate dimensions, jewelry assortment, compartment needs, exterior and lining materials, color direction, hardware, logo method and packaging scope. These points create the working reference for later approval. For brands planning the project from an earlier sourcing stage, our private label jewelry storage box guide explains what to confirm about structure, materials, branding, packaging and quality requirements before bulk production.
The confirmation basis varies by project. It may include a buyer’s drawing, a physical reference, an existing Ezicase structure, photographs or written dimensions. CAD drawings are not a universal requirement or a standard deliverable for every project.
At this stage, buyers should clarify:
- Which dimensions affect jewelry fit, retail display or shipping?
- Which materials and colors are required, and which are still open for selection?
- Is the internal layout fixed or expected to be adjusted after testing?
- Which hardware details matter to the design, such as hinges, locks, handles or drawer pulls?
- Is logo application included in this sample?
- Is retail or shipping packaging part of the same approval round?
Buyers who are still defining their product can first review the jewelry case collection and the jewelry box buying guide to compare common structures and use cases.
How Should Buyers Review the Exterior and Overall Construction?
Start with the box as a complete object. Check whether its proportions, opening method, drawer arrangement and visual balance match the approved direction. Then inspect the exterior under normal room light and angled light, because uneven gloss, surface marks and inconsistent color can appear differently as the box is moved.
For a painted wooden or MDF jewelry box, review the flatness of the panels, the consistency of the finish, the cleanliness of the edges and the alignment between the lid, body and drawers. For a leather-covered structure, look at wrapping tension, corner treatment, seams, joint placement and surface consistency. Natural wood grain, engineered veneer and printed woodgrain finishes should not be described interchangeably; the approved material name should match what is actually supplied.
Do not create an arbitrary universal tolerance during a visual review. Agree what is acceptable for the selected material and finish: high gloss reveals marks more readily than a textured covering, while natural materials may show controlled variation.
Useful exterior checks include:
- overall dimensions and proportion;
- lid and drawer alignment;
- finish color, gloss or texture;
- clean edges, corners and joints;
- stability on a flat surface;
- absence of unexpected gaps, rocking or rubbing;
- consistency of visible hardware color and placement.
Photograph the sample from the front, sides, back, top and open position to create a practical remote-review record.
Does the Interior Layout Work With the Intended Jewelry?
An empty compartment drawing does not prove that the final layout is convenient. Place representative rings, earrings, bracelets, necklaces, pendants and watches into the physical sample. The aim is to check real fit, access and separation—not simply whether every compartment exists.
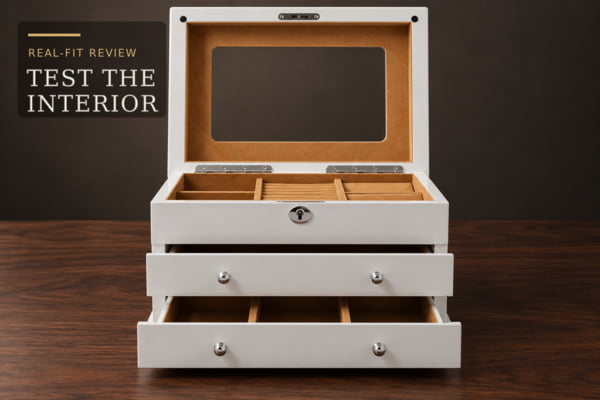
Ring rolls should hold the intended ring sizes without excessive force or looseness. Necklace areas should provide enough usable length and should reduce unnecessary tangling. Bracelet and watch sections need suitable width and depth for the intended products. Removable trays should be easy to lift without catching adjacent parts, while fixed dividers should remain straight and secure.
Open the lid fully, insert representative jewelry, and close the lid and drawers slowly to check for contact or compression. Remove the items to look for snagging, marks or difficult access, then repeat the movements to identify inconvenient details.
The internal layout should be judged against the target assortment rather than a generic idea of capacity. A design for fine rings and earrings may require a different balance from one intended for watches, bangles and statement necklaces. The jewelry box compartment sizing guide explains how jewelry dimensions affect divider spacing, cushion size and usable depth.
What Should Be Checked About Lining, Cushions and Removable Parts?
Interior materials affect both presentation and daily handling. Review the lining color in the lighting conditions relevant to the target market, and compare it with the approved reference where one exists. Check that the surface is clean, consistently applied and free from visible glue marks, lifting edges or uneven tension.
Check seams, divider edges and ring rolls for rough points that may catch delicate pieces. Removable trays and cushions should fit securely while remaining practical to lift. Test watch or bracelet cushions with representative product sizes.
Interior material names also need careful wording. Velvet, microfiber, suede-look fabric and PU-based materials have different constructions and should not be treated as equivalent. If a precise material specification matters to the project, confirm it in the agreed project record. Supporting documents are not automatically included with every sample; their availability and format depend on the project and should be requested when needed.
For a closer comparison of common options, see the guide to jewelry box lining materials for custom projects.
How Should Drawers, Hinges, Locks and Other Hardware Be Tested?
Hardware should be reviewed through repeated normal use. Open and close the lid, operate every drawer, and test any lock, clasp or handle supplied with the sample. The movement should be consistent with the agreed design, and adjacent parts should not collide, scrape or become difficult to operate.
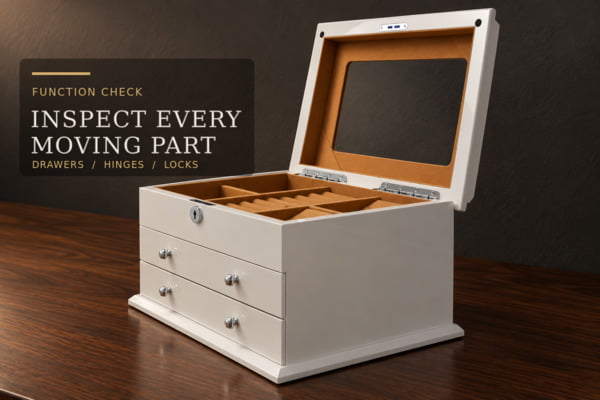
Check whether drawers sit evenly when closed and whether the gaps remain visually consistent. Pull each drawer from its normal operating point rather than from one corner. If the design includes removable trays or multiple levels, confirm that users can reach each section without an awkward sequence.
For hinges and lid supports, observe alignment and stability throughout the opening range. Confirm that locks operate smoothly. Avoid subjective approval criteria such as “luxury”; record the required action—for example, realign a drawer front, reduce rubbing at a specific edge or change the hardware finish.
How Should Logo, Color and Decorative Details Be Approved?
Branding should be judged on the actual sample surface whenever possible. A logo method that works on a flat painted panel may not produce the same result on textured PU, fabric lining or curved hardware. Confirm placement, size, orientation, color, contrast and edge definition in relation to the finished product.
Do not rely only on a digital preview. View the logo as it will appear online, on a retail shelf and during unboxing. If it is applied to both box and packaging, approve each application separately.
Color approval also needs a defined reference. Depending on the project, this may be a supplied material swatch, an agreed physical sample, a recognized color reference or an existing product. Screen images are useful for direction but can display colors differently. Record the accepted reference and note any controlled variation associated with the chosen material.
Should Packaging Be Approved With the Jewelry Box Sample?
Packaging may be reviewed during the jewelry box sample stage, in a separate round or later in the project. There is no universal sequence: it depends on whether the scope includes retail packaging, protective shipping packaging, branded inserts or only the product itself.
When packaging is included, test it with the actual box. Confirm that the product fits without excessive movement, protective materials do not mark the finish, and the box can be removed safely. Review printed elements against their own references.
Transport protection cannot be concluded from appearance alone. The required packing method and any project-specific testing should be agreed according to the product, order and shipping route. Avoid stating that a package has passed a particular test unless that test was actually specified and completed.
For a closer look at the standard protection layers used for bulk orders, see our guide to jewelry box shipping packaging.
How Should Sample Revisions and Final Approval Be Recorded?
The clearest approval record identifies the exact sample version, lists accepted items and separates them from changes still required. Use numbered comments and annotated photographs so that “adjust the drawer” becomes a specific instruction linked to a visible location.
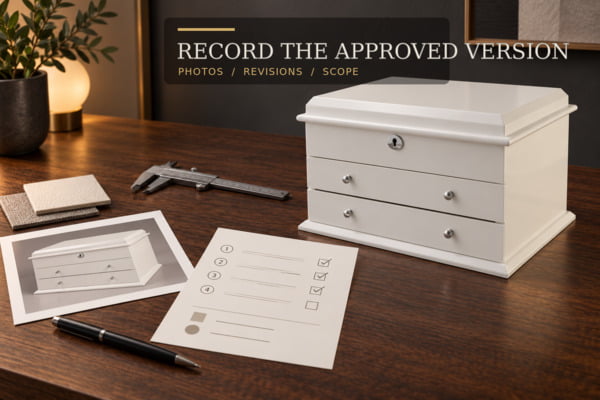
A practical record can include:
- project or model reference;
- sample date or version;
- confirmed dimensions and materials;
- approved exterior and lining references;
- approved hardware and logo details;
- packaging status, if included in scope;
- numbered revisions with photographs;
- items requiring another physical check;
- final approval date and responsible contacts.
Not every revision requires the same response. A wording correction on an insert may be confirmed differently from a structural change to a drawer, tray or lid. The buyer and supplier should decide whether photographs, an updated reference or another physical sample is appropriate for each item.
For some important projects or orders, an approved sample may be retained as a production reference. This is not automatic for every order, so retention, identification and storage should be confirmed for the specific project. Any accompanying drawings, specifications, material records or inspection documents are likewise project-dependent rather than default sample attachments.
Only approve bulk production when the agreed approval items are closed or when any remaining differences are explicitly accepted in writing. A controlled record helps purchasing, sales and production teams work from the same version and reduces ambiguity later.
What Happens After the Sample Is Approved?
After approval, the project moves toward bulk production based on the confirmed sample and project record. Production timing, quantity, inspection scope and packaging should be reconfirmed because they vary by design and order. Changes requested after approval may affect cost, timing or the need for another sample. Once mass production begins, the approval record should be carried forward into material, workmanship, functional, branding and packaging checks. Our jewelry box quality control checklist outlines the inspection points buyers can use to assess a bulk order before shipment.
If the project is still comparing constructions, the article on wooden versus leather jewelry boxes can help buyers clarify the preferred route before committing to a detailed sample. Buyers ready to develop their own product can also review Ezicase customization options.
Frequently Asked Questions
How long does a custom jewelry box sample take?
For Ezicase custom jewelry box projects, sample development typically takes about 10–30 days. Structure, materials, finish, hardware, branding, packaging scope and revision requirements can all affect the schedule. Confirm timing after the sample specification is defined rather than treating the range as a guaranteed delivery date.
Is a CAD drawing required before sampling?
No. The working reference depends on the project and may include buyer drawings, written dimensions, reference images, a physical sample or an existing structure. CAD is useful for some projects but is not a standard requirement or default deliverable for every custom jewelry box sample.
Does sample approval automatically include packaging and documents?
No. Packaging may be confirmed with the product sample, separately or later. Specifications, material records and other documents also depend on project requirements. Buyers should list the packaging and documentation they need when confirming the sample scope.
Build the Sample Around the Real Use Case
A strong jewelry box sample should confirm whether the proposed design solves the buyer’s actual storage needs.
For example, one of our custom project began with a specific need to reduce necklace tangling during travel. Instead of simply applying a standard compartment layout, the design discussion focused on how the necklaces should be separated and held in place while still providing practical space for rings and earrings.
Different projects may prioritize display, portability, larger jewelry pieces or the unboxing experience. Sample development allows the dimensions, internal layout, materials and functional details to be adjusted around these real requirements before bulk production.
